

Crocheting a baby blanket is one of the most rewarding and heartfelt projects you can take on as a beginner. There’s something truly special about creating a cozy, handmade gift that’s both practical and filled with love. If you’ve ever wanted to try your hand at crocheting, starting with a baby blanket is the perfect way to begin. Why? Because it’s simple, repetitive, and doesn’t require advanced skills. Plus, the end result is a soft, snuggly blanket perfect for a newborn.
This guide is designed to walk you through every step of crocheting a baby blanket. We’ll cover everything from choosing materials to mastering the basic stitches and finishing techniques. Even if you’ve never picked up a crochet hook before, don’t worry—this guide is written with beginners in mind. Let’s dive in and start this exciting journey!
Why Crochet a Baby Blanket?
There are plenty of reasons why crocheting a baby blanket is such a popular project for beginners. Here are a few:
1. It’s a Meaningful Gift
A baby blanket is more than just a piece of fabric—it’s a symbol of care, effort, and thoughtfulness. Whether it’s for your own baby, a grandchild, or a friend’s little one, a handmade blanket becomes a cherished keepsake that families treasure for years.
2. Perfect for Beginners
If you’re new to crocheting, baby blankets are ideal because they’re simple and don’t require complicated patterns. Most baby blanket designs involve repeating just one or two basic stitches, making them easy to learn and execute.
3. Budget-Friendly Project
You don’t need a huge investment to get started. With just a crochet hook, some yarn, and a little patience, you can create something beautiful. Plus, you can customize the blanket to fit any budget, whether you go for high-quality luxury yarn or an affordable option.
4. Creative and Relaxing
Crocheting is not just about creating something; it’s also a form of therapy. The repetitive motion of crocheting is calming, helping you relax and unwind. And as you see the blanket grow, you’ll feel a deep sense of accomplishment.
5. Customizable for Any Style
From choosing the colors to picking the stitch patterns, you can completely personalize your baby blanket. Whether you want something bright and playful or soft and pastel, the possibilities are endless.
Here’s a quick comparison of why crocheting a baby blanket is such a wonderful beginner project:
| Reason | Details |
|---|---|
| Easy for beginners | Uses basic stitches and repetitive patterns |
| Quick project | Smaller size means you can finish it faster than a larger blanket |
| Personalized gift | You can choose colors, patterns, and styles to match the baby’s nursery |
| Affordable | Requires minimal tools and materials |
| Relaxing hobby | Crocheting reduces stress and provides a creative outlet |
By the time you finish your first baby blanket, you’ll not only have a wonderful gift but also a newfound confidence in your crochet skills. Now that you know why crocheting a baby blanket is the perfect project, let’s look at the materials you’ll need to get started.
Materials You’ll Need
Before you can start crocheting, you’ll need to gather the right materials. Don’t worry—you don’t need a huge list of supplies to get started. Here’s everything you’ll need for your baby blanket project:
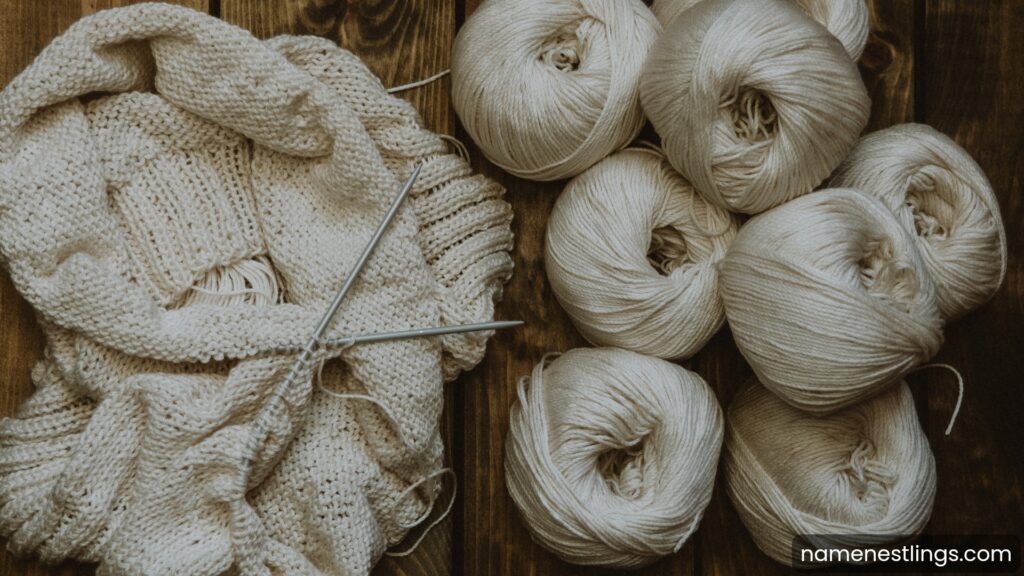
1. Yarn
Yarn is the most important material for your baby blanket. Choosing the right type of yarn ensures your blanket is soft, safe, and comfortable for a baby’s sensitive skin. Look for these qualities when picking yarn:
- Material: Opt for baby-friendly yarn made from cotton, bamboo, or acrylic. These materials are soft, hypoallergenic, and easy to care for.
- Weight: Worsted weight or DK (double knit) yarn is perfect for beginners because it’s not too thick or thin. It’s also easy to work with and creates a good-sized blanket.
- Color: Choose light or pastel colors like soft pink, baby blue, mint green, or cream. These shades are soothing and traditional for baby items.
Pro Tip: Some yarns are labeled as “baby yarn,” making it even easier to choose. Look for yarns marked “machine washable” for easy cleaning.
| Yarn Type | Features | Best For |
|---|---|---|
| Cotton | Natural, breathable, and soft | Summer or lightweight blankets |
| Acrylic | Affordable, durable, and easy to wash | Everyday use and budget-friendly |
| Bamboo | Super soft, silky, and eco-friendly | Luxurious and delicate blankets |
| Blends | Combines materials for softness and durability | Versatile and long-lasting projects |
2. Crochet Hook
The crochet hook you choose will depend on the yarn you’re using. Most baby blankets use hooks between sizes 4mm (G/6) and 5.5mm (I/9). Check the label on your yarn—it usually recommends the ideal hook size.
- Material Options: Hooks come in various materials like aluminum, plastic, and bamboo. Aluminum hooks are great for beginners because the yarn slides easily over them.
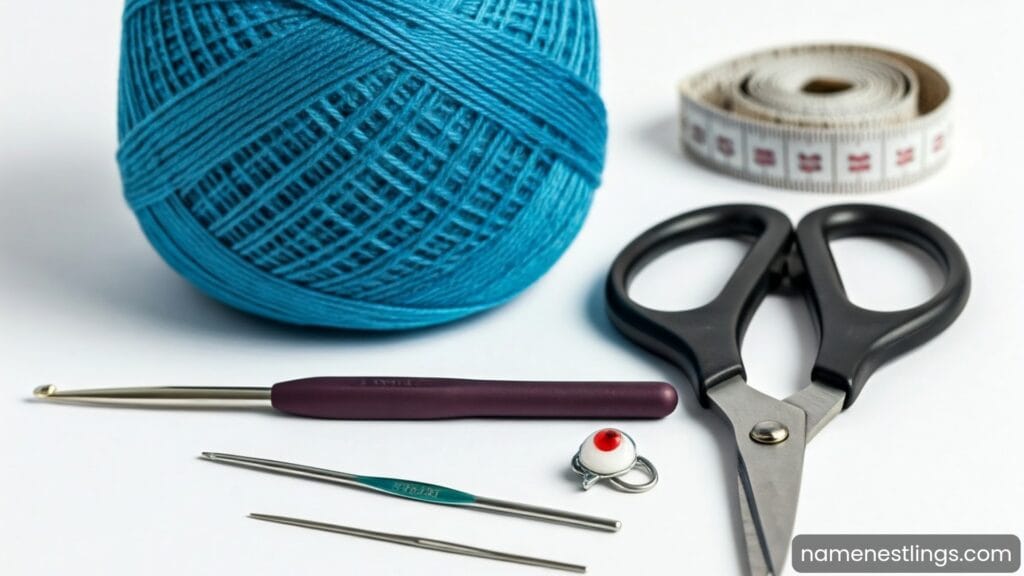
3. Scissors
You’ll need sharp scissors to cut your yarn cleanly. A small, lightweight pair of scissors is perfect for this project.
4. Tapestry Needle
A tapestry needle (or yarn needle) is used to weave in the loose ends of yarn once your blanket is complete. Look for a needle with a large eye to accommodate thicker yarn.
5. Stitch Markers (Optional)
Stitch markers are small clips or rings that help you keep track of your rows or stitches. They’re especially useful for beginners to prevent mistakes.
6. Measuring Tape
A measuring tape ensures your blanket is the right size. Most baby blankets are between 30×30 inches and 40×40 inches, but you can adjust the size based on your preference.
Here’s a handy checklist to make sure you have everything:
| Material | Purpose | Tips |
|---|---|---|
| Yarn | The main fabric of your blanket | Choose soft, baby-friendly yarn |
| Crochet Hook | Helps you create stitches | Match the hook size to your yarn |
| Scissors | Cuts the yarn cleanly | Keep them sharp |
| Tapestry Needle | Weaves in yarn ends | Look for large-eye needles |
| Stitch Markers (Optional) | Tracks rows and stitches | Useful for beginners |
| Measuring Tape | Ensures the correct blanket size | Check dimensions regularly |
With these materials in hand, you’re ready to begin crocheting your baby blanket. Next, let’s learn the basic crochet stitches you’ll need to know as a beginner.
Basic Crochet Stitches for Beginners
If you’re new to crocheting, don’t worry—it’s easier than it looks! Most baby blankets use just a few simple stitches that are beginner-friendly. Mastering these stitches will set you up for success.
1. Slip Knot
The slip knot is the first step in almost any crochet project. It’s how you secure your yarn to the crochet hook.
How to Make It:
- Make a small loop with your yarn.
- Pull a strand of yarn through the loop to create a second loop.
- Tighten the knot around your hook.
2. Chain Stitch (ch)
The chain stitch forms the foundation of your blanket. It’s the most basic crochet stitch, and you’ll use it to create the starting row.
How to Do It:
- Wrap the yarn around your hook (this is called a yarn over).
- Pull the yarn through the loop on your hook.
- Repeat until you have the desired number of chains.
3. Single Crochet (sc)
Single crochet is a simple, tight stitch that creates a solid fabric. It’s perfect for baby blankets because it’s soft and warm.
How to Do It:
- Insert your hook into the next chain stitch.
- Yarn over and pull up a loop (you’ll have two loops on your hook).
- Yarn over again and pull through both loops.
4. Double Crochet (dc)
Double crochet creates taller stitches and works up faster than single crochet. It’s often used to add texture and height to a blanket.
How to Do It:
- Yarn over and insert your hook into the next stitch.
- Yarn over again and pull up a loop (three loops on your hook).
- Yarn over, pull through the first two loops, then yarn over and pull through the last two loops.
5. Slip Stitch (sl st)
The slip stitch is used to join stitches or finish a row. It’s not typically used for the main fabric but is helpful for finishing techniques.
How to Do It:
- Insert your hook into the next stitch.
- Yarn over and pull through both the stitch and the loop on your hook.
Here’s a quick comparison of the main stitches you’ll use:
| Stitch | Abbreviation | Use | Difficulty |
|---|---|---|---|
| Slip Knot | None | Secures the yarn to your hook | Very Easy |
| Chain Stitch | ch | Foundation row | Very Easy |
| Single Crochet | sc | Tight, solid fabric | Easy |
| Double Crochet | dc | Taller, textured stitches | Easy |
| Slip Stitch | sl st | Joining and finishing | Very Easy |
Practice Tip: Before starting your blanket, spend some time practicing these stitches with scrap yarn. Getting comfortable with the basics will make the blanket easier and more fun to create!
Step-by-Step Instructions to Crochet a Baby Blanket
Now that you’ve gathered your materials and practiced the basic stitches, it’s time to start crocheting your baby blanket. This step-by-step guide will walk you through the process, making it easy to follow along even if you’re a beginner. Take it one step at a time, and don’t rush—crocheting is all about enjoying the process.
Step 1: Decide on the Blanket Size
Baby blankets come in various sizes, depending on their intended use. Here’s a quick guide to standard sizes:
| Type of Baby Blanket | Dimensions (inches) | Purpose |
|---|---|---|
| Receiving Blanket | 30 x 30 | Wrapping a newborn or light cover |
| Crib Blanket | 36 x 52 | Fits inside a standard crib |
| Stroller Blanket | 30 x 40 | Ideal for on-the-go warmth |
| Lovey | 12 x 12 | Small comfort blanket for babies |
For beginners, a 30 x 30-inch receiving blanket is an ideal starting size. It’s small enough to complete quickly but large enough to be useful.
Step 2: Create a Foundation Chain
- Start with a slip knot on your hook.
- Using the chain stitch (ch), create a foundation chain that matches the desired width of your blanket.
For example, if you’re making a 30-inch blanket and your yarn suggests 4 stitches per inch, chain 120 stitches.
- Add two extra chains to allow for turning at the end of the row.
Pro Tip: Keep your chain loose to avoid a tight, bunched-up edge. A looser chain makes the first row much easier to work.
Step 3: Work the First Row
- Starting in the third chain from your hook, create a row of single crochet (sc) stitches.
- Insert your hook into the chain, yarn over, pull up a loop, yarn over again, and pull through both loops.
- Continue this process until you’ve worked into each chain across the row.
- At the end of the row, chain one and turn your work.
Step 4: Repeat Rows to Build Your Blanket
- For the next rows, continue using single crochet (sc) or switch to another stitch like double crochet (dc) for variation.
- Always remember to chain one (or two for taller stitches) at the end of each row before turning your work.
- Keep going until your blanket reaches the desired length.
Step 5: Add Color Changes (Optional)
If you’d like to add stripes or blocks of color:
- At the end of a row, cut your current yarn and leave a small tail.
- Join a new color by tying it onto your hook, then start the next row with the new yarn.
- Weave in the loose ends later using your tapestry needle.
Step 6: Finish the Last Row
Once your blanket reaches the desired size:
- Work a row of slip stitches (sl st) to create a clean, finished edge.
- Cut your yarn, leaving a 6-inch tail, and pull it through the final loop to secure.
Finishing Techniques
Congratulations! You’ve completed the main body of your baby blanket. Now, it’s time to finish it off with some easy yet beautiful techniques to make your blanket look polished and professional.
1. Weave in Loose Ends
Every time you change colors or finish a row, you’re left with loose yarn tails. Weaving them in ensures your blanket stays neat and secure.
How to Do It:
- Thread the yarn tail onto a tapestry needle.
- Insert the needle into the stitches of your blanket, working in the same direction as the stitches.
- Weave the tail back and forth a few times to secure it.
- Trim any excess yarn close to the blanket.
Pro Tip: Weave in the ends along the edge of the blanket, as this area is less noticeable.
2. Add a Border
A border adds the perfect finishing touch to your baby blanket, giving it a clean and decorative edge. You can keep it simple or choose something more intricate based on your style.
Simple Single Crochet Border:
- Attach your yarn to any corner of the blanket.
- Work single crochet (sc) stitches evenly along each side of the blanket.
- At each corner, work three single crochets into the same stitch to turn smoothly.
- Join the final stitch with a slip stitch and fasten off.
Scalloped Edge (For a Fancy Look):
- Work five double crochet (dc) stitches into one stitch, skip the next two stitches, and repeat around the blanket.
- This creates a delicate, wavy border that looks beautiful on baby blankets.
3. Block Your Blanket
Blocking is the process of shaping your crochet piece to ensure it lays flat and the stitches look even. This step is optional but highly recommended, especially for beginners.
How to Block:
- Gently wash the blanket in cold water with a baby-safe detergent.
- Lay the blanket flat on a clean towel or blocking mat.
- Pin the edges in place to ensure they’re straight and even.
- Let the blanket air dry completely before removing the pins.
4. Add Personal Touches (Optional)
If you want to make the blanket extra special, consider adding some personal touches:
- Sew on small, baby-safe appliques like stars, hearts, or animals.
- Embroider the baby’s initials or name using yarn and a tapestry needle.
- Add a satin ribbon bow to one corner for a cute finishing detail.
Troubleshooting Common Beginner Mistakes
As a beginner, it’s natural to encounter a few bumps along the way. Here are some common mistakes and how to fix them:
1. Uneven Edges
Uneven edges often happen when you accidentally add or skip stitches at the beginning or end of a row.
- Solution: Count your stitches at the end of each row to ensure consistency. Use stitch markers to mark the first and last stitches of the row so you don’t miss them.
2. Tight or Loose Stitches
If your blanket looks bunched up or has large gaps, your tension might be inconsistent.
- Solution: Practice holding your yarn and maintaining even tension as you crochet. If your stitches are too tight, loosen your grip on the yarn. If they’re too loose, tighten your hold slightly.
3. Missed Stitches
Missing a stitch can create holes or uneven rows.
- Solution: Double-check each row to ensure you’re working into every stitch. If you notice a mistake early, unravel the row and fix it.
4. Curling or Warping
If your blanket starts to curl or warp, it could be due to uneven tension or using the wrong hook size.
- Solution: Make sure you’re using the recommended hook size for your yarn. Blocking the blanket can also help flatten out any curling.
By addressing these common issues and following the finishing techniques, your baby blanket will look clean, even, and ready to use.
Tips for Success
Crocheting a baby blanket as a beginner is an exciting journey, and with a few simple tips, you can make the process even smoother. Here are some practical suggestions to help you succeed:

1. Start with a Simple Pattern
As a beginner, avoid jumping into complex designs with advanced stitches. Choose a basic pattern with straightforward instructions, such as one that uses only single crochet (sc) or double crochet (dc). The simpler the pattern, the more confident you’ll feel as you work.
2. Practice Makes Perfect
Before diving into your blanket, take some time to practice your stitches. Use scrap yarn to master the chain stitch, single crochet, and double crochet. This will help you build muscle memory and make fewer mistakes when working on your blanket.
3. Use a Comfortable Hook
Crocheting can be time-intensive, so it’s important to use a crochet hook that feels good in your hands. Ergonomic hooks are designed to reduce hand strain and are perfect for long projects like baby blankets.
4. Count Your Stitches
One of the most common beginner mistakes is losing or adding stitches, leading to uneven edges. Count your stitches at the end of each row to ensure accuracy. If you’re working on a long blanket, consider placing stitch markers every 10 stitches to keep track.
5. Take Breaks
Crocheting for long periods can cause hand and wrist fatigue. Take regular breaks to stretch your hands and rest your eyes. This will help you stay comfortable and avoid overworking yourself.
6. Watch Tutorials
If you’re struggling with a stitch or technique, video tutorials are an amazing resource. Watching someone else demonstrate can make it much easier to understand tricky steps.
7. Don’t Aim for Perfection
Remember, this is your first project, and it’s okay if it’s not perfect. Small mistakes add character to handmade items and make them unique. Focus on enjoying the process rather than stressing over every detail.
8. Join a Community
Crocheting can feel more enjoyable when you’re part of a community. Join crochet groups online or locally to ask questions, share progress, and learn from others. This also keeps you motivated to complete your project.
9. Stick to a Routine
If your baby blanket is a gift, you might be working on a deadline. Set aside a specific time each day to work on your project. Even 15–30 minutes of crocheting daily can add up quickly.
10. Invest in Quality Tools
While it’s tempting to go for the cheapest materials, investing in good-quality yarn and hooks will make your experience much more enjoyable. Soft, durable yarns and smooth hooks are easier to work with and result in a better-looking blanket.
By following these tips, you’ll feel more confident and have a smoother experience creating your baby blanket.
Caring for Your Handmade Baby Blanket
Once your baby blanket is complete, proper care is essential to keep it looking and feeling its best. Here’s how to care for your handmade creation:
1. Wash with Care
Handmade baby blankets often require gentle washing to prevent damage.
- Hand Washing: Use cold water and a mild, baby-safe detergent. Gently swirl the blanket in the water without wringing or scrubbing.
- Machine Washing: If your yarn is labeled as machine washable, use a delicate cycle and cold water. Place the blanket in a mesh laundry bag to protect it during the wash.
2. Dry Flat
Avoid putting your baby blanket in the dryer, as the heat can shrink or distort the yarn. Instead, lay the blanket flat on a clean towel or drying rack to air dry. Reshape it gently as it dries to maintain its form.
3. Avoid Harsh Chemicals
Don’t use bleach or fabric softeners, as these can weaken the yarn and make it less soft. Stick to gentle, baby-friendly detergents.
4. Store Properly
When the blanket isn’t in use, store it in a clean, dry place to prevent dust or damage.
- Use a breathable bag or container to keep the blanket fresh.
- Avoid plastic bags, which can trap moisture and lead to mildew.
5. Repair When Needed
Over time, the blanket may develop small holes or loose stitches. Keep a crochet hook and some leftover yarn handy for quick repairs. Fixing issues early prevents them from becoming bigger problems.
Quick Care Guide
| Step | Tips |
|---|---|
| Washing | Hand wash or use the delicate cycle with cold water |
| Drying | Lay flat to air dry; avoid using a dryer |
| Storage | Store in a breathable bag to prevent moisture buildup |
| Repairs | Fix loose stitches or holes promptly using your crochet hook |
Proper care ensures that your handmade baby blanket remains soft, beautiful, and functional for years to come.
Final Thoughts
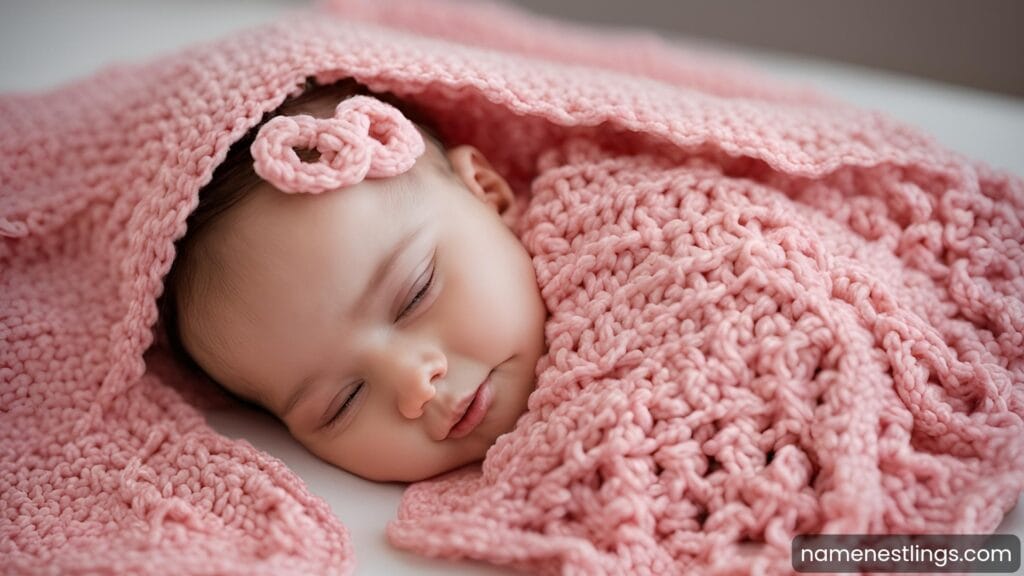
Crocheting a baby blanket is a beautiful way to combine creativity and love. As you’ve worked through this project, you’ve not only crafted a cozy gift but also created something deeply meaningful for a little one. Handmade blankets carry a warmth that store-bought items simply can’t match, and your effort will be cherished by the baby and their family.
This guide has walked you through every step of crocheting your first baby blanket, from choosing soft, baby-safe materials to learning beginner-friendly stitches and finishing techniques. With this skill in your hands, you’ve opened the door to a world of creative projects perfect for parenting milestones, baby showers, or even adding a personal touch to your little one’s nursery. Keep practicing, and soon you’ll be confident enough to try more advanced designs!
Ready to make more handmade magic? Explore other fun and creative baby projects like crocheted hats, toys, or even personalized baby name plaques. For more parenting tips, baby names, and project ideas, explore the rest of our site and subscribe for updates. Share this guide with friends who’d love to start crocheting, and don’t forget to show off your finished blanket—we’d love to hear about your experience! Happy crocheting!